Monday, March 24, 2014

Fast, Fun and Friendly

So, by now you are probably all assuming I have completely given up this blog.  The truth is, I come back to it for recipes, but I just haven't seemed to be able to find the time to post a whole lot.  I will start this up again when my life settles down a little during the days.  Having a kindergartner keeps me on my toes.

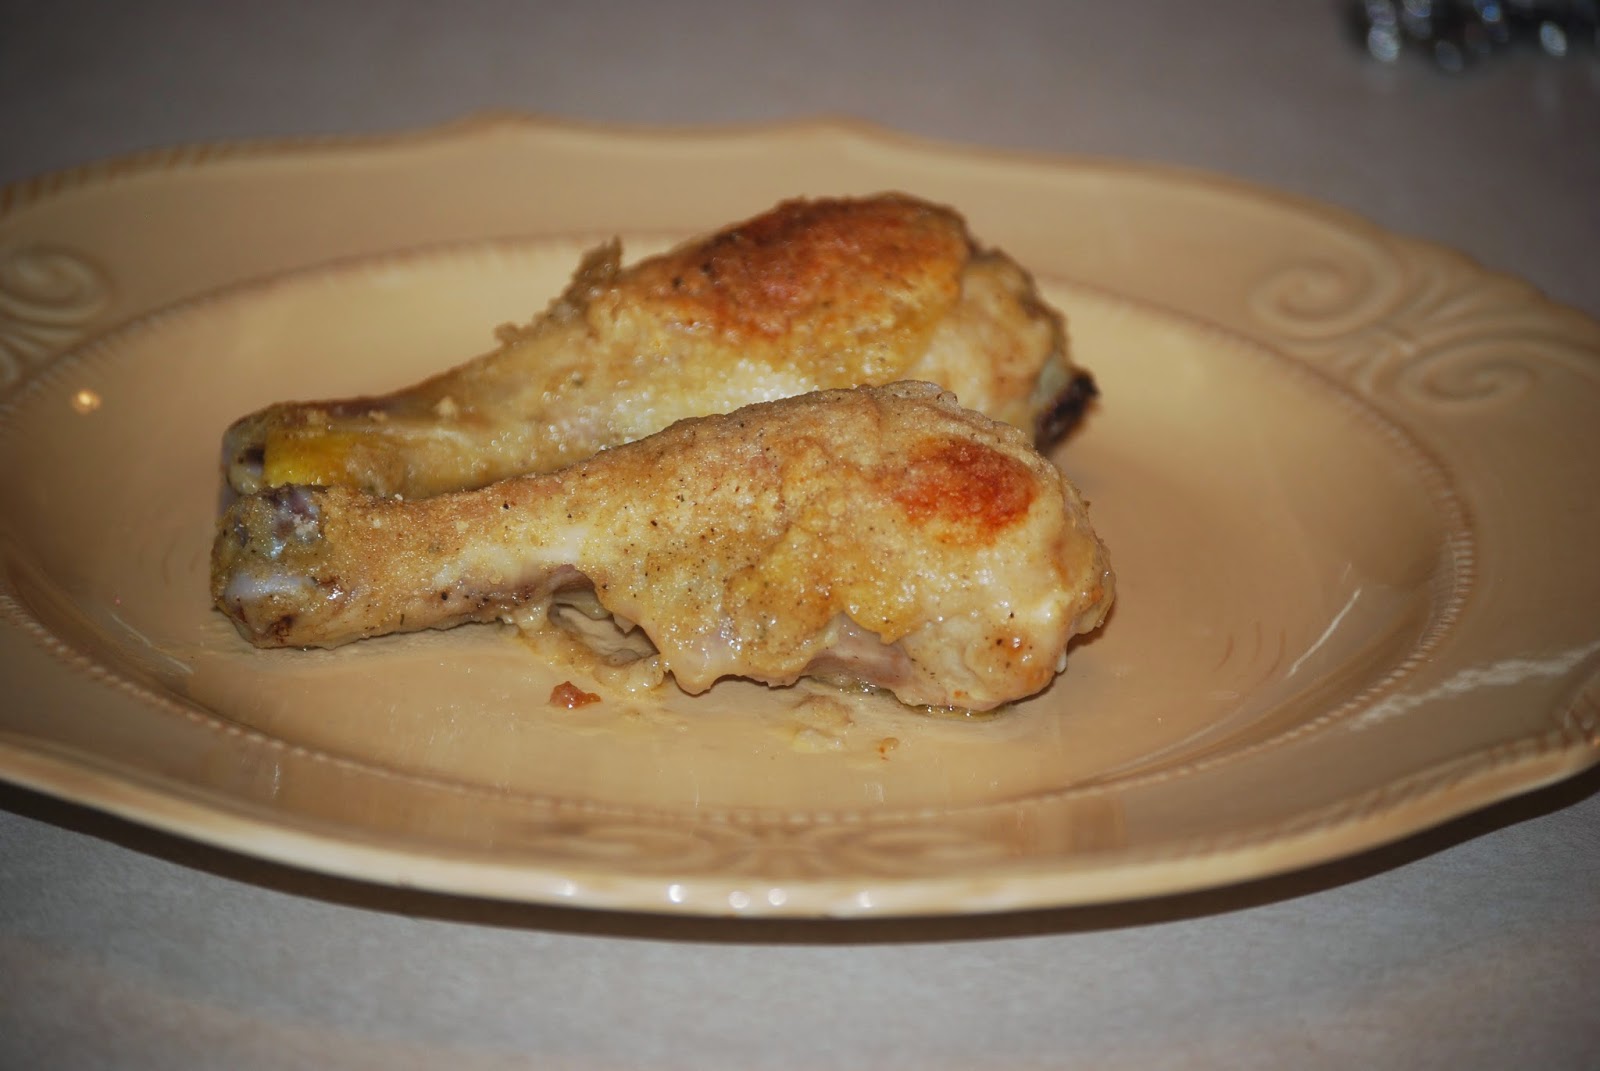
I wanted to post this really fast because if you are like me, you are crazy busy about this time of year.   We are starting back into spring soccer, which just happens to overlap our indoor winter soccer for the first time ever and baseball is starting, up too.  With gymnastics, piano and guitar on top of that, we are maxed out.  So...when I find a recipe that is super fast, happens to have whole grains in it, and my family (kids included!!!) seem to ALL love, I tend to make it a little more frequently.  This recipe is straight out of my cookbook, which you can purchase at the link on my home page...wink, wink.  These drumsticks are about the easiest meal of all time to prepare.  You can either make them with the skin (not quite so healthy) or take the skin off (not quite so easy).  We have done it both ways and my kids don't seem to care which way they are prepared...they still devour them.

So, for you busy mamas and daddies out there...here is the recipe that might just save your life...or your sanity.


Oven-Baked Ranch Crusted Drumsticks
**L**
1⁄2 C whole wheat flour
1 tsp salt (optional)
1⁄2 tsp paprika
1T dry ranch seasoning (can be found in a packet) 1⁄4 tsp pepper
6 chicken drumsticks
1⁄4 C butter, melted

Heat oven to 425 degrees. Mix flour, salt, paprika, ranch seasoning and pepper in a bowl. Dip chicken drumsticks into butter; roll in flour mixture to coat. Arrange in an ungreased square pan, 8 x 8 x 2 inches. Bake, uncovered, until done, about 50 minutes. Yields: 8-10 drumsticks.
**L** For a healthier option, you can remove the skin on the drumsticks and then coat with seasoning.

Tuesday, October 8, 2013

Ginger "dead" men

Okay, I know I've been gone like...forever...at this point.  The truth of the matter is that I'm now on a PTA board, my kids are in multiple sports, and life has gotten a bit crazy.  So...I've been slacking a bit on the blog.  But...I did make these tonight and they were so good and so much fun!!!  I saw the idea on pinterest...they are ginger "dead" men.  My kids loved making them and I actually got to experiment with a new whole wheat recipe.  It worked out so well!  Whole wheat is really easy to substitute in gingerbread recipes because the goal of the cookie is to be flat...whole wheat is great for that!  It doesn't affect the flavor at all and they are MUCH healthier!  Anyway...here is the recipe!  I hope to see you again.  Scroll down a couple of posts and you'll see TONS of my Halloween posts from last year!!!

Ginger “dead”  Men

2 1/2 C + 2 T whole wheat flour
1 tsp baking soda
1 tsp cinnamon
1 tsp ginger
1/2 tsp allspice
1/2 tsp ground cloves
1 tsp salt
1 stick salted butter, softened
1/4 C butter-flavored Crisco
1/2 C packed brown sugar
2/3 C molasses
1 egg

Mix together dry ingredients (flour, baking soda and spices and salt).  In another bowl, mix butter, crisco together.  Blend in sugar and molasses and egg and beat for 1 1/2 - 2 minutes.  Add dry ingredients to wet ingredients and mix until thoroughly combined.  Divide into two segments and wrap each segment in saran wrap.  Chill for at least 3 hours. 

Remove from fridge and sprinkle flour on a piece of parchment paper.  Put flour on a rolling pin and roll out to 1/8 in. thick.  Cut into gingerbread men.  Bake at 375 degrees for about 9-11 minutes. 

Let cookies cool.  Use white frosting and pipe on a skeleton.  Serve as “gingerdead” men.


Monday, October 29, 2012

Halloween!


I thought I'd share some of my favorite Halloween treats from this year and last year.  Please notice how easy they all are.  Obviously someone has a little too much going on this year!

Here they are:

Witch's Brooms...pretzel stick in a Reese's Chocolate Peanut Butter Cup (the mini kind). 


White chocolate skeletons...self-explanatory, except use the markers that are edible!


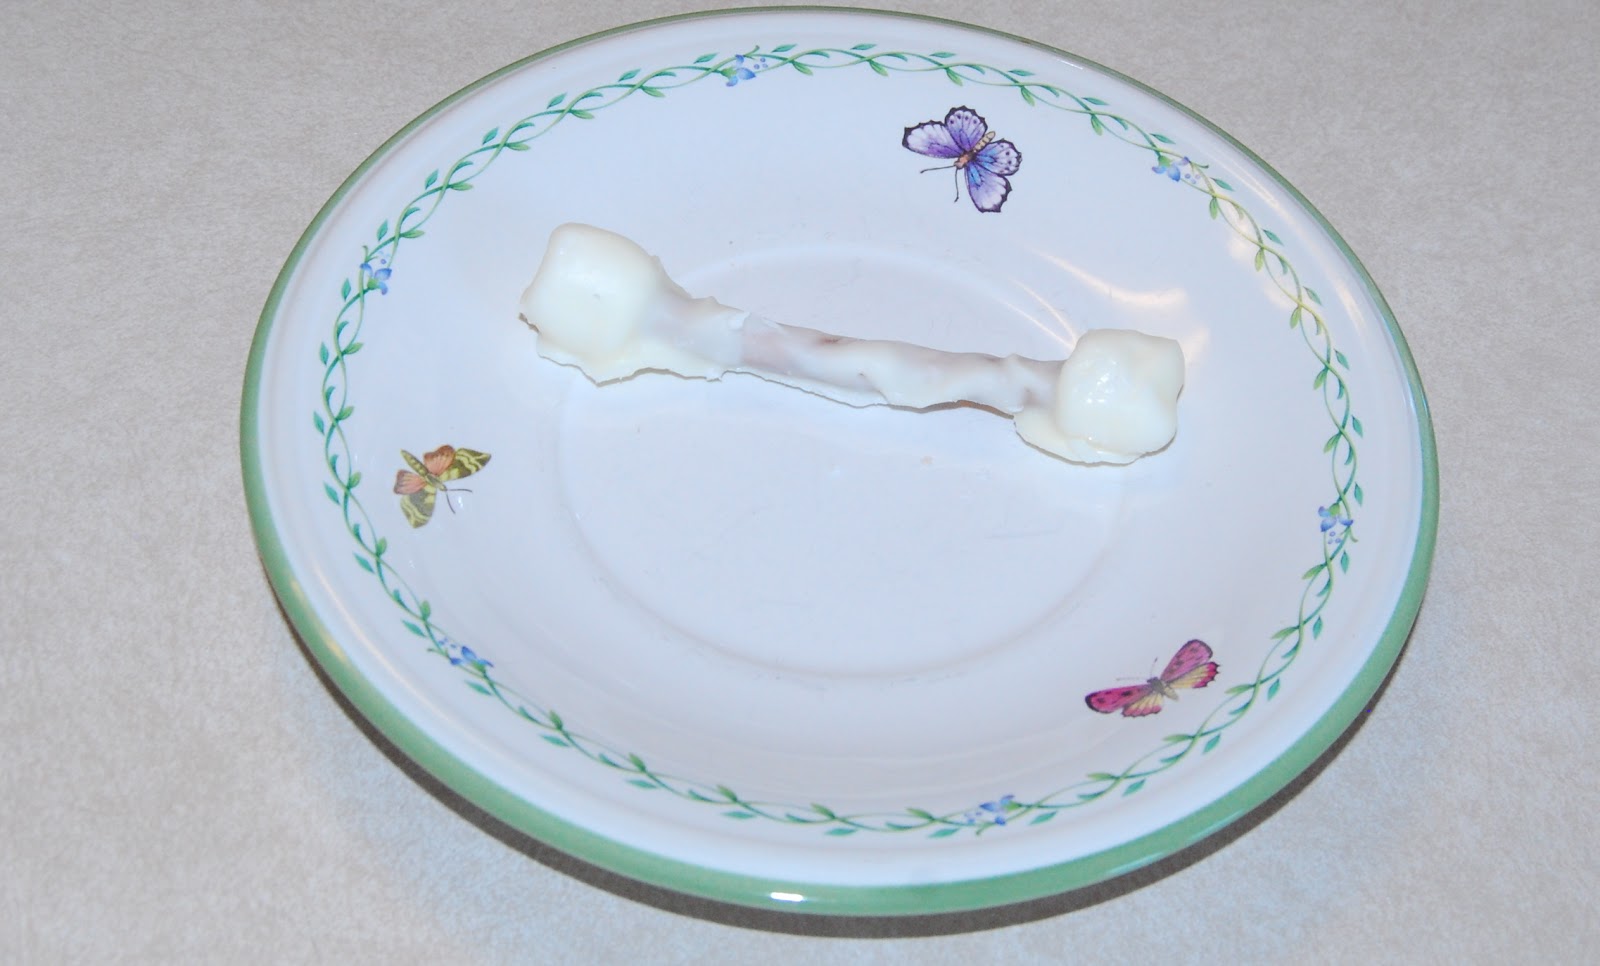
White chocolate covered bones...this one wasn't the best, but it was all I had left before it was devoured...


Not pictured from this year are the Witch's Hats.  They are made from fudge-striped cookies with a dollup of brown/black icing and a chocolate "kiss" stuck on the icing in the middle of the upside down cookie (the brown side).  

You can also find:

Mummy Pizzas


Ghost Eclairs


An Amazing Witch's Brew


Hotdog Mummies


Bone Breadsticks


Wednesday, October 17, 2012

Easiest ever Pumpkin Chocolate Chip Muffin recipe


These are pretty much a staple at my house in autumn.  You probably already have the recipe, but if you don't...you need it!  My friend, Stacey, one of those perpetually thin, beautiful people, recommended this recipe.  When you have a friend who is perfectly toned all the time, like Stacey, and she tells you she has a delicious recipe that is also VERY low in calories and tastes like it would be loaded with calories...you tend to listen.  Ever since she shared this recipe with me...like 8 years ago or something...these muffins are a frequent visitor of the Allen household.  P.S.  Stacey was right...even with the chocolate chips...these only have 94 calories a piece!!!  Without the chocolate chips, the way Stacey makes them, they are only 54 calories a muffin!  If only I didn't crave that chocolate...

 Easiest Ever Pumpkin Chocolate Chip Muffin Recipe


1 box spice cake mix
1 16 oz. can pumpkin
3/4 C- 1 C chocolate chips
1/2 C water

Mix all ingredients together with mixer on low speed for about a minute and then on medium speed for another minute.  Spoon into greased muffin tins about 3/4 full.  Bake at 350 degrees or 20 minutes.

Friday, October 12, 2012

Chocolate Pancakes

Chocolate pancakes?  Why?  Here are my many reasons for making chocolate pancakes:

1.  They are full of whole grains
2.  They are delicious
3.  My kids absolutely loved them
4.  My husband loved them
5.  Cocoa is a powerful antioxidant and full of nutrients
6.  I didn't have to fight my kids to eat them
7.  Because they are so dark...no one knows if I burned them or not (just kidding!)

Chocolate Pancakes

3 C milk
2 eggs
1/4 C vegetable oil
2 1/2 C whole wheat flour
2/3 C unsweetened cocoa powder (I used Dutch Process Cocoa)
1/2 C sugar
1/2 tsp. baking soda
2 T baking powder
1 tsp. salt

Mix together milk, eggs and oil.  Add flour, cocoa powder, sugar, baking soda, baking powder and salt.  Mix on high speed for 2 minutes.  Bake on greased, preheated griddle.


Wednesday, October 10, 2012

Chicken Enchilada Soup


Okay, why do I love this soup so much?  Well, I saw a very similar recipe on a blog and thought..."hmmmm...that is full of veggies, my family probably wouldn't like it.  hmmm...but you do puree the veggies.  hmmm...I'm going to try this out and see how it goes over."  Well, I'm pleased as punch to tell you that my family LOVED it!  My husband kept saying, "This is AWESOME!"  My kids told me it was amazing...even my son who HATES butternut squash loved it.  They had no idea that is was amazing healthy with all kinds of pureed veggies composing the thick broth.  All they knew was that they LOVED it...that is a winner in my book.

Chicken Enchilada Soup

8 C chicken broth (or 8 C water and 8 tsp. powdered chicken broth)
3-4 boneless, skinless chicken breasts (I used frozen)
1 large yellow onion, peeled and roughly chopped
3-4 medium potatoes
2 red bell peppers, seeded and roughly chopped
3 cloves garlic
1/2 medium butternut squash, peeled and chopped ( had mine already pureed and stored in the freezer)
3 cloves garlic
1 tsp. salt
1 1/2 tsp. cumin

Place all of the above ingredients in a large pot.  Bring to a full boil.  Reduce heat and cover and simmer for about 20 minutes or until veggies are soft and chicken is cooked through.  Remove chicken and puree the rest of the soup in a blender.  Return pureed soup to pot.  Chop or shred chicken into bite-size pieces.

Add:

3/4 C sour cream
1-8 oz. can tomato sauce
4 C cooked Great Northern beans (2 cans)
2 T taco seasoning

Stir in above ingredients and mix in cooked chicken.  Serve with tortilla chips, shredded cheese, etc.

For Delicious Vegetarian Version:

Switch chicken broth for vegetable broth, do not add any chicken and stop after addition of cumin.   Puree veggies and return to pot.  I've done this with the chicken broth only, but it was delicious WITHOUT the chicken in it!

Monday, October 8, 2012

Chunky Broccoli Cheese Soup

Autumn is finally here!  The nights are brisk and cold and the morning air is crisp with the dusting of ice on the grass.  Its that time...my favorite time of the year.  It is the time for soup.  This soup was a huge hit with my family and since it uses a crockpot...it was a huge hit for me.


Chunky Broccoli Cheese Soup

3 T powdered chicken broth
10 C water
3-5 chicken boneless, skinless chicken breasts


Mix above ingredients in crockpot and cook on low for about 4-6 hours or until chicken is cooked through and no pink remains.  Cut chicken into cubes with kitchen scissors.  When you have about an hour left of cooking, add cut broccoli...I added three heads of broccoli to my soup.

1/2 C butter
3/4 C whole wheat flour
1 C milk
3 C shredded cheddar cheese

Melt butter in saucepan over low heat on stove.  Add whole wheat flour and stir.  Slowly stir into crockpot until all flour/butter is dissolved into the soup and it starts to thicken a little.  Let cook on high for about 15 minutes.  Add 1 C of milk and stir in cheese.  Cook soup in crockpot on high until all cheese is melted.

That is it...easy, delicious, and healthy!

Wednesday, September 19, 2012

100% Whole Wheat Thins

I've been trying to make crackers forever!  I've tried so many different recipes and none of them worked...until this one.  These were amazing and tasted just like wheat thins!  I'm not kidding.  Even my kids commented that they tasted like wheat thins, without me prompting them.  I'm speaking in past tense because they are gone now...devoured almost immediately.  My kids loved them and I'll definitely be making them again.

100% Whole Wheat Thins

1 1/4 C whole wheat flour
1/2 tsp. salt
1 1/2 T sugar
1/4 tsp. paprika
1/4 C cold butter sliced into tablespoons (four of them)
1/4 C water
1/4 tsp. vanilla
salt


In a food processor, add whole wheat flour, salt, sugar and paprika.  Slice butter and space evenly around the food processor.  Turn it on high power until it is throughly combined (it will be very crumbly).  Add water and vanilla to the middle of the mixture and stir.  I knead the mixture with my hands to make sure it is all mixed up (it should be one large ball).  Preheat oven to 400 degrees.  Lightly spray wax paper with cooking spray.  Place dough in the middle of the wax paper and roll out very thin.  Transfer dough to cookie sheet by turning wax paper over the cookie sheet.  Carefully peel off the wax paper.  Use a pizza cutter or sharp knife to cut into cracker-sized squares.  Bake for 5-10 minutes (if you don't get them thin enough, you may have to bake them a little longer).  They should be very light brown on the edges.  Remove and let cool before you eat them.  Yum!!!


P.S.  Sorry for the MIA status on my blog for the last while.  Life gets busy sometimes.

Friday, August 10, 2012

Home-made McGriddles??? What???

 Alright, let me start this post by admitting something...my children have eaten at McDonald's for breakfast...more than once...actually more than twice.  They have a Nana who treats them to breakfast at McDonald's on special occasions, and they LOVE it!!!  One of the things they love most are the McGriddles.  Many of you may be ignorant as to what a "McGriddle" actually is, so I'll give you a brief description.  They are tiny pancakes that have the syrup already baked inside of them so they can be hand-held.  They are very sweet, but leave you with a waxy film in your mouth (not really sure why and a little too scared to ask).  Anyway, my kiddos think they are divine.  Enter my problem...they are supremely unhealthy.  So, why do I want to make them so much?

1.  They are hand-held and thus can be carried out the door in a hurry (not that we are ever late)
2.  They are delicious
3.  These "McGriddles" are somewhat healthy, made with whole grains
4.  There is no sticky film in my mouth
5.  I can control the amount of syrup in their pancakes and they don't complain!!!

So, how do you do it?  Simple.  Pour out a small amount of batter (less than 1/4 C because they spread out when you add the syrup).  Drizzle syrup IMMEDIATELY in the more central area (it oozes out if you get it too close to the edge).  Let it bake and flip it over!


Go here for the recipe:

Nana's Whole Wheat Pancakes


Saturday, August 4, 2012

Cashew Chicken


I've never tried to make cashew chicken before, so I was very pleased when this turned out delicious on my first try!  It was very healthy and very low fat because it was made with NO OIL!  I know, there are oils in cashews, but we know that the oil in nuts is the healthy kind of oil, so I'm okay with that.  Did my kids love the celery?  No.  Did they love the cashews?  No.  Did they eat the meal without complaining for the most part...yes!  I'll take that as a win!  Oh, and my husband loved it!  I thought the flavors blended superbly well and this will definitely make it into my "things to make for company" recipe list.

Cashew Chicken
4 chicken breasts
6 T apple cider or apple juice
4 T soy sauce
2 T sugar
Mix apple cider, soy sauce and sugar.  Cut chicken into bite-sized pieces and marinate for 3 hours.  Pour chicken and marinade in pre-heated wok and stir-fry until chicken is no longer pink.  This will take at least five minutes.  Drain marinade, turn off heat on wok and prepare sauce.  
Sauce:
4 C water
5 tsp. powdered bouillon 
1 C celery (cut into ½ inch segments)
2 tsp soy sauce
1 T whole wheat flour
2 T brown sugar
1 T corn starch mixed with 1 T water
whole wheat pasta
Mix together whole wheat flour, bouillon and water.  Bring to a boil.  Add celery, brown sugar, and soy sauce.  Mix cornstarch with 1 T water and add to sauce.  Stir until it thickens.  Let sauce simmer until celery is tender-crisp or to desired texture.  Reheat wok with chicken in it.  Pour sauce in wok and add cashews.  Cook 5-10 minutes until cashews are softer and celery is desired texture.  Serve over brown or black rice, bulgar wheat, or whole wheat pasta

Tuesday, July 31, 2012

Red Lentil Enchiladas (version 2)


Here is another version of Baked Lentil Enchiladas that we liked just as much.  Why would I make a recipe so similar to another one I have?  Well, I found out while I was already half-way into the recipe, that I didn't have green enchilada sauce.  I DID, however, have red enchilada sauce.  So, I poured a can of that instead into the crockpot.  I then decided, after it was all cooked, that a creamy touch of sour cream would probably top off the meal with perfection and guess what...WE LOVED IT!  So, no matter what kind of enchilada sauce you have stocked, these are great!!!

Baked Lentil Enchiladas (version 2)

1/4 C finely chopped onions
1 jalapeno, seeded and finely chopped
1 1/2 C red lentils, rinsed
4 C vegetable or chicken broth (I use chicken broth, but vegetarians, will prefer vegetable broth)
2-10 oz. cans red enchilada sauce (I like medium)
1/4 C sour cream
cheese (as desired)
10-12 whole wheat tortillas

Finely chop onions and jalapeno and put in crockpot.  Rinse lentils and put in crockpot.  Add chicken broth.  Cook on low in the crockpot for 4-6 hours, stirring occasionally.  Add 1 can red enchilada sauce.  Stir in sour cream.  Preheat oven to 350 degrees.  Spray 13X9 pan with cooking spray.   Spoon into whole wheat tortillas and roll up and place in prepared pan. Pour the other can of enchilada sauce over the rolled enchiladas.  Grate cheese and sprinkle as much as desired over enchiladas.  Cover with foil and bake for 30 minutes.

Sunday, July 22, 2012

Spaghetti Squash (sorry no pics!)

This was my first attempt at making spaghetti squash and it was actually VERY easy.  I didn't know how it all "worked"...I mean the whole stringy, spaghetti-like thing.  When I scooped out the seeds, it looked like a pretty normal squash.  I found out later, that it is AFTER you bake it that it gets that spaghetti-like quality to it.  First I'll give you the directions for roasting it that I used and then I'll tell you what I did with it.

Roasting Spaghetti Squash

Preheat oven to 350 degrees.
Cut the squash in half length-wise (use a large serrated knife if you have one so you don't slip and cut yourself!)
Scoop out all seeds and pulp.
Place cut-side down on a cookie sheet sprayed with cooking spray.
Bake for 30-45 minutes or until outside is easily pricked with a fork...should be very soft!
Use a fork and pull out all that "spaghetti" stuff from the inside!!!

Now...what did I do with this?

I beefed up my spaghetti!  I simply mixed it in to my whole wheat spaghetti.  It made MUCH MORE spaghetti and was virtually undetectable!  Tonight, my son ate it and had no idea there was squash in it!  Oh...and this is my son who HATES squash!  So...I call that a success!  There is only one thing I'll do differently next time...I'll make sure my daughters are out of the room before I add it to the spaghetti...

Friday, July 20, 2012

Baked Mozzarella Sticks

I made these tonight and was a huge hit with the neighborhood kids and with my own little charges.  I had a hard time figuring out the baking time, but I finally figured out two ways that yield positive results.  I think I may like the broiling way a little better...but you have to watch CAREFULLY to make sure they don't melt!!!

Baked Mozzarella Sticks

10 sticks of string cheese
3 T softened butter
2 eggs
1/4 C whole wheat flour
6 T whole wheat bread crumbs (slices of whole wheat bread baked at 200 for a few hours until thoroughly dried, then blended in a blender)
3 T grated Parmesan cheese

Cut cheese sticks in half and freeze in a freezer bag for a few hours.  Line a cookie sheet with foil.  Mix together the bread crumbs and Parmesan cheese.  Remove frozen cheese sticks from freezer.  Spread softened butter on each cheese stick and then roll in whole wheat flour.  Roll cheese stick in whole wheat flour.  Next roll it in the egg and finally roll it in the bread crumb/Parmesan cheese mixture.  Spray foil-lined cookie sheet with cooking spray.  Lay coated cheese sticks on cookie sheet.

Now...for baking:

You can do this one of two ways.  I think I prefer the broiling method.

Broiling:  Broil cheese sticks for about 3 minutes or until lightly golden brown...but be careful so they don't melt!!!

Baking:  Bake at 450 for 5-6 minutes...once again...be careful they don't melt!!!

You will need to do a test one to see how long your oven takes to bake them.  Ovens sometimes heat and different rates and you need to be careful with these.  ALSO...make sure you wait until they cool a little to eat them, but don't wait too long so the cheese hardens back to a cheese stick.

Monday, July 16, 2012

Baked Coconut Chicken Fingers

It isn't often that I make a meal where each person in my family RAVES about it during and after eating it.  It isn't often that I come upstairs to find my kids eating, before the prayer.  It is NEVER when I say, "We haven't said the prayer yet," and my kids respond by saying, "We already said the prayer!"  It isn't often that my husband says, "That was AWESOME!"  more than once in the same meal.  Yep, this meal was a hit.  I think I'll make it again.


Baked Coconut Chicken Fingers

1 C sweetened flaked coconut
1/2 C whole wheat flour
1/2 tsp. salt
1/4 tsp. garlic powder
1/8 tsp. pepper
1 egg, slightly beaten
1/3 C melted butter
1/8 tsp. pepper
1 T milk
1 1/2  pounds boneless skinless chicken breasts (cut in half and then into 1" strips)

Preheat oven to 400 degrees.  Mix all ingredients together except chicken.  It will form a kind of paste texture.  Coat each piece of chicken individually with mixture.  I had to do this with my hands one at a time...it didn't take very long.  Bake on middle rack for about 25-30 minutes.  Turn chicken over and bake for another 5-10 minutes.  Turn over again and return to top rack.  Bake for a few more minutes until top is golden brown.  My family LOVED these!!!

Serve with honey, barbecue sauce or apricot preserves.  We prefer honey!

Tuesday, July 10, 2012

Baked Lentil Enchiladas

Okay, this was not originally my recipe...but the original recipe, for some reason allowed some crunch to the lentils and my family did not love it.  Because it is so healthy, I decided to try it again and made some changes to the recipe and guess what the major difference was...THE CROCKPOT!!!  Yep, its true!  It was way easier and was made early and ready when we got home from church...and guess what...it had a very consistent texture, with no crunch to the beans, so my family really liked it!!!  I was thrilled!  So, I'm now adding a recipe I had decided wasn't going to work for my family back into my frequently prepared recipe repertoire!  Yay!

P.S.  Sorry the photo doesn't accurately portray the taste of the food...but you get the gist!!!

Baked Lentil Enchiladas

1/4 C finely chopped onions
1 jalapeno, seeded and finely chopped
1 1/2 C red lentils, rinsed
4 C vegetable or chicken broth (I use chicken broth, but vegetarians, will prefer vegetable broth)
28 oz. green enchilada sauce
cheese (as desired)
8-10 whole wheat tortillas
salsa
sour cream

Finely chop onions and jalapeno and put in crockpot.  Rinse lentils and put in crockpot.  Add chicken broth.  Cook on low in the crockpot for 4-6 hours, stirring occasionally.  Add 1 C green enchilada sauce.  Preheat oven to 350 degrees.  Spray 13X9 pan with cooking spray.   Spoon into whole wheat tortillas and roll up and place in prepared pan. Pour the rest of the enchilada sauce over the rolled enchiladas.  Grate cheese and sprinkle as much as desired over enchiladas.  Cover with foil and bake for 30 minutes.  Serve with salsa and sour cream.


Monday, July 2, 2012

Independence Day Ideas

Okay, I have a confession...I'm not going to be home on the Fourth this year.  I'm going to a family reunion and I'm not even making food that day...well, maybe I'll make something, but I'm not going to a barbecue or anything where I would bring anything super festive.  So...I'm going to repost from past Independence Day meals and some links to what I'm planning to do for the 24th of July...a holiday only celebrated in Utah and maybe Idaho.  Anyway...here are the posts.  Sorry for the repeats!!!


Rich, Delicious Chocolate Cake
1 C buttermilk
½ C vegetable oil
2 C sugar
½ C applesauce
2 tsp vanilla extract
2 eggs
1¾ C whole wheat flour
¾ C cocoa powder
2 tsp baking soda
¼ tsp baking powder
½ tsp salt
1 C boiling water

Preheat oven to 315 degrees. Grease and flour 9X13 pan. Mix buttermilk, oil, sugar, applesauce and vanilla. Add eggs and mix until well blended. Mix together, flour, cocoa powder, baking soda, baking powder, and salt. Stir flour mixture into wet ingredients. Bring 1 C water to a boil and stir into the cake mix. Mix for 1 ½ minutes until well-blended. Pour into prepared pan and bake for about 50 minutes or until toothpick inserted in middle comes out clean. When cool, frost with Fluffy White, Buttercream Frosting. Five minutes before serving line up 48 blueberries in rows 8 on the top, 6 down. Then slice the strawberries in half and line them up end to end to make the stripes (make sure they are all facing the same way). SO CUTE!!!


Fluffy, White Buttercream Frosting

5 sticks butter
9 C powdered sugar
3 T milk
1 tsp vanilla

Two hours before preparing frosting, get 5 sticks of butter out of refrigerator. Whip butter for several minutes until creamy and fluffy. Add powdered sugar 1 C at a time, beating the entire time. Keep beating until frosting is very thick. Add milk and vanilla and beat.
Note: If frosting seems too thick, add an additional tablespoon of milk.

FYI...this dessert is great for Memorial Day, Labor Day, Flag Day, or if you live in Utah the 24th of July. You could also make the Ooey Gooey Not-So-Wheaty Brownies instead of chocolate cake (it is in the dessert segment of my blog) 

Obviously, this one is not exactly Independence Day ready...what I would do, if I were staying home, is to use cool whip and mix 1-2 Cups with vanilla pudding (so it is lighter) and use that instead of the chocolate pudding.  Then I would alternate with blueberries...so strawberries, pudding, blueberries pudding, strawberries, pudding, blueberries...or something like that...I will try to make it that way on the 24th.

Here is the recipe...this one uses brownies:

Ooey Gooey Not-So Wheaty Brownies
3⁄4 C softened butter
1 1⁄2 C sugar
2 tsp vanilla
4 eggs
3⁄4 C sifted whole wheat flour
1⁄2 tsp baking powder
1⁄2 C cocoa powder
1⁄4 tsp salt
1 C chocolate chips, chopped (optional)

Preheat oven to 350 degrees. Cream the butter and sugar. Add vanilla and eggs. In another bowl mix the whole wheat flour, baking powder, cocoa powder and salt. Add the dry ingredients to the wet ingredients and mix. Bake 30-40 minutes in a greased 13X9 pan. This is a family favorite and I have yet to meet anyone who can tell that there is whole wheat in it!!! YUM!!! If using chocolate chips, fold in after mixing all other ingredients. They make take a few minutes longer to bake, but this is how I prefer to make them...they are so good!

For Fudgier Brownies: Subtract one egg. Bake 30-40 minutes.

For Cake-Like Brownies: Add an egg. Bake 30-40 minutes.


And then...you need this recipe:


Smooth Chocolate Strawberry Trifle

3 C cold milk
2-3 1⁄2 oz. pkgs. chocolate instant pudding
1-8 oz. whipped topping
Ooey Gooey Not So Wheaty Brownies
21⁄2 C sliced strawberries

Mix milk and pudding for at least two minutes, until well blended and starting to thicken. Fold in 1 C of the whipped topping. Dice brownies into 1 in. cubes.

Layer the following:
half the brownies half the pudding mix half the raspberries
Use the other half of each to make another layer of brownies, pudding mix, and raspberries. Top with leftover whipped topping and serve! Guaranteed to make everyone ooh and aah!
Note: You can substitute raspberries, blueberries, blackberries, mixed berries, etc.


As for the suckers...well, there is no wheat, they are just cute. Since I usually post something fun to do with your kids on Fridays, I thought I would post this as an option for kids to make if you are having a 4th of July party at your house or going to a big get-together where there will be lots of children. Kids LOVE making these are they are easy and fun!!!


Fourth of July Suckers

Jolly rancher candies
Sucker sticks
Parchment paper

Preheat oven to 250 degrees. Line a cookie sheet with parchment paper. Put three jolly ranchers in a vertical line, touching each other. (You can do this as many as will fit AS LONG AS YOU HAVE ROOM TO PUT THE SUCKER STICKS IN THE BOTTOM!!!) Melt in the oven for 8 minutes. Remove from oven and press sucker stick into the bottom of the sucker (you want at least ¾ -1 in of sucker stick inside the sucker). Roll the sucker stick completely around until the whole stick is coated in melted sucker. Add sprinkles or colored sugars while still hot. Let cool until solid (at least 10 minutes). We then wrap them in sucker bags and tie them with ribbon. Kids LOVE these and they can do ALMOST all of it by themselves!!!


Now, as for what I WANT to do...Pinterest helped me out a lot.  I want to make this drink this year:


And these parfaits look so cute and are on the lighter side of desserts:


I would like to do this fruit platter, because it is cute and healthy!


Cute stuff, huh!  There are other ideas I would like to try out, too, but I'll post those when things slow down a little! If you are in the great states of Utah and Idaho...there will be more before the 24th!

Friday, June 29, 2012

Snickerdoodle Cookies


I made these tonight for something we call Family Home Evening.  Its a night where we share scriptures or scripture stories as a family.  A treat is a fundamental aspect of Family Home Evening, as every member of my church will tell you.  Anyway, tonight, I made these.  Tifani is one of my greatest friends from graduate school.  We lived near each other at a time when none of us had family and we had to rely on each other to be our family.  I LOVE this girl...and when she makes something and says, "its really good"...it always is.  Well, she made these cookies for us and they were SO GOOD!!!  So, they made it into the recipe book, but I have to confess, I haven't made them in years!  Tonight, I pulled out my cookbook and got the recipe out and made them and yep, they were just as good as I remembered them.  They are slightly flatter than your white flour snickerdoodle, but the taste is right on!  They are amazing and definitely worth a try in your kitchen this week!

Tifani's Delicious Snickerdoodles

1⁄2 C butter, softened
1⁄2 C brown sugar, packed 
1⁄4 C white sugar 
1 egg 
11⁄2 tsp vanilla extract 
11⁄2 C finely-ground whole wheat flour 
1⁄2 tsp baking soda 
1⁄2 tsp cream of tartar 
1/8 tsp salt 
3 T white sugar 
1 tsp cinnamon

Preheat oven to 350 degrees.  Cream butter and sugars together. Add egg and vanilla and beat. Combine dry ingredients (flour, baking soda, cream of tartar and salt) and beat into wet ingredients. Roll into 1-inch balls. Mix cinnamon and sugar. Roll balls in cinnamon mixture. Place 2 inches apart on an ungreased cookie sheet. Bake 8-10 minutes.

P.S.  For a slightly thicker cookie, you can add up to 2 T of whole wheat flour and mix it right in.  I like them just fine without the extra flour, but if presentation is your thing...go ahead and add it!

Monday, June 25, 2012

Artichoke Chicken Bake


Here is another recipe straight out of my cookbook.  This one was a huge hit with my husband and my parents.  It is delicious and easy and if you love artichokes (like my husband), this will quickly make it into your "family favorites" repertoire.  


P.S.  I am starting to compile recipes for my next cookbook...so if you've been waiting for some of the recipes on my blog to be bound into a book, don't worry, its coming. 

Artichoke Chicken Bake

1⁄4 C onion, finely chopped 
2 garlic cloves, minced 
4 boneless, skinless chicken breasts 
1/3 C whole wheat flour 
1 tsp salt 
11⁄4 tsp paprika 
1⁄2 tsp rosemary 
1/8 tsp pepper 
1⁄2 C chicken broth 
1⁄4 C apple juice 
1-7.5 oz. can artichoke hearts, drained and chopped

Preheat oven to 350 degrees. Mix onion and garlic together. Pour into 13X9 pan. Mix flour, salt and spices and put in a gallon-sized baggie. Put chicken in baggie and shake to coat. Lay on top of onions and garlic in pan. Mix chicken broth and apple juice and pour over chicken. Bake uncovered for 40 minutes. Chop artichoke hearts. Remove pan from oven and sprinkle artichoke hearts over chicken. Cook for another 15-20 minutes.

Saturday, June 23, 2012

Snickerdoodle Muffins


We've been in the middle of a move and life is about as crazy as it can get.  We just got the internet today, so pretty soon, I'll be back to normal with my blog.  I made these muffins before we ever moved, knowing that life would be crazy for a while.  Even though its been about a month or more since I made these, I remember clearly how I felt about them.  They were SOOO good!  I don't know what else to say.  They tasted like dessert and my kiddos LOVED them!  If you love snickerdoodle cookies...you'll love these!

P.S.  I also have a wonderful Snickerdoodle cookie recipe that I'll post sometime soon!!!


Snickerdoodle Muffins

3 C freshly ground whole wheat flour
1 1/2 tsp. baking powder
1 tsp. salt
2 1/4 tsp. cinnamon
1/2 C oil
1/2 C applesauce
3 eggs
3/4 C vanilla greek yogurt (can do plain, too)
2 C sugar
1 T vanilla
1/2 tsp. baking soda
1 pkg. Hershey's cinnamon chips
Cinnamon/sugar mixture (optional)

Preheat oven to 375 degrees.  Mix all ingredients except cinnamon chips.  Stir in cinnamon chips.  Bake for 12-15 minutes.  Sprinkle cinnamon/sugar mixture on top of muffins, if desired.

Note: These muffins are a little temperamental.  Sometimes they are the perfect shape, sometimes they turn out a little flat.  They taste FABULOUS!  It is always a good idea to bake one muffin first. If the muffin is too flat, or has a dip in the middle, add flour starting with 2 T until desired consistency is reached.

Thursday, June 14, 2012

Presentation is Everything...Another "Green" Smoothie Fix!!!

Okay, this is genius.  I know that sounds conceited, but there is really no other way to describe the brainstorm I had today.  Am I a genius, heavens no...but this idea...well, it is!  If you are a frequent green smoothie maker, you know there is one major problem...those green smoothies, although good, are spotted from a mile away and immediately categorized outside of the realm of "yummy" smoothie.  These smoothies are usually some form of brown.  Bummer!  Kids immediately recognize it as food of the "enemy".  Enter today's brainstorm...okay, lets backtrack a little.  A few weeks back I got a certain vegetable that I know is nutritionally power-packed...its incredible for our bodies.  They offer Glycine betaine, which is great for your heart, folates, necessary for DNA synthesis in our bodies, vitamin-C a powerful antioxidant, many B vitamins (B-3, B-5, B-5), iron, manganese, magnesium and potassium.  Yep, its one of those veggies we should all eat, but MOST don't love.  Its color is a deep red.  What is it???  Beets!!!  I got a bunch of beets in my Bountiful Basket.  What to do...what to do?  Who likes beets?  Well, I decided to puree them.  Here's what I did:

I brought a pot of water to a full boil
Cut the tops of the beets
Boiled them for 20-30 minutes until tender
Let them cool and rinse with cold water
Peel skins off
Pureed them with some of the beet water (just enough to get a good smooth consistency)


Now...for my green smoothie

2 frozen pellets of kale and spinach using this method.
1/4 of a honeydew melon
5-10 frozen strawberries
about 1-1 1/2 C water
1 frozen banana
5-10 frozen 1 inch. chunks of pineapple
1 pear
1 orange

This smoothie made for a nasty brown color...ENTER THE BEETS!!!!  I added about 1/4 C of pureed beets and VOILA!  A smoothie my kids LOVED because it had a bright red color!  It looked just like a Jamba Juice Smoothie!!!


P.S.  That frozen fruit is fruit that I realized was getting too ripe and being eaten too infrequently...those fruits are AWESOME for green smoothies!!!

P.P.S.  You could probably use raw beets, and it would be even healthier!  I never have done it, though.  If someone does, please tell me how it turns out!!!

UPDATE!!!!  My husband just came home, drank the smoothie and said, "mmm...raspberry"...yep, that's what it looks like!