Friday, July 30, 2010

Delicious Meal, Whole Wheat, Fun for the Whole Family...what is it???


CALZONES!!! My family LOVES this and every family I have ever made this meal for loves it. Calzones are delicious, healthy and great for entertaining because they look difficult and everyone loves them...kids, picky husbands, etc. My kids LOVE to help with this meal because they are kind of like individual pizzas...you can make them EXACTLY how you want them!!! So...go buy some fun toppings, invite someone over and have fun making dinner together...you won't be disappointed!!!


Calzones
**V**
Dough:
2½ tsp quick active dry yeast
1¼ C warm water
½ tsp sugar
1 T vegetable oil
1 tsp salt
1½–3 C whole wheat flour
1½ tsp dough enhancer (optional, found at health-food stores)
1½ tsp gluten (optional, found at health-food stores)

Preheat oven to 375 degrees. Mix yeast, sugar and water together until yeast is dissolved and let it sit for 5 minutes. Add vegetable oil to yeast mixture. Add 1C flour, the gluten and dough enhancer. Sprinkle the salt over the flour and mix. Add flour, ¼ C at a time until dough is not sticky. Knead for five minutes and place dough in a greased bowl. Cover and put in a warm place to rise for about 30-45 minutes. (I like to preheat the oven and put the bowl on top of the pre-heated oven.) When you touch the dough lightly and the indentation remains, your dough is done.

2½ C shredded mozzarella cheese
¾ C pepperoni
2/3 C ricotta cheese
¼ C chopped fresh basil
3 roma tomatoes, chopped
2 T wheat berry puree
1 egg, beaten with a fork slightly

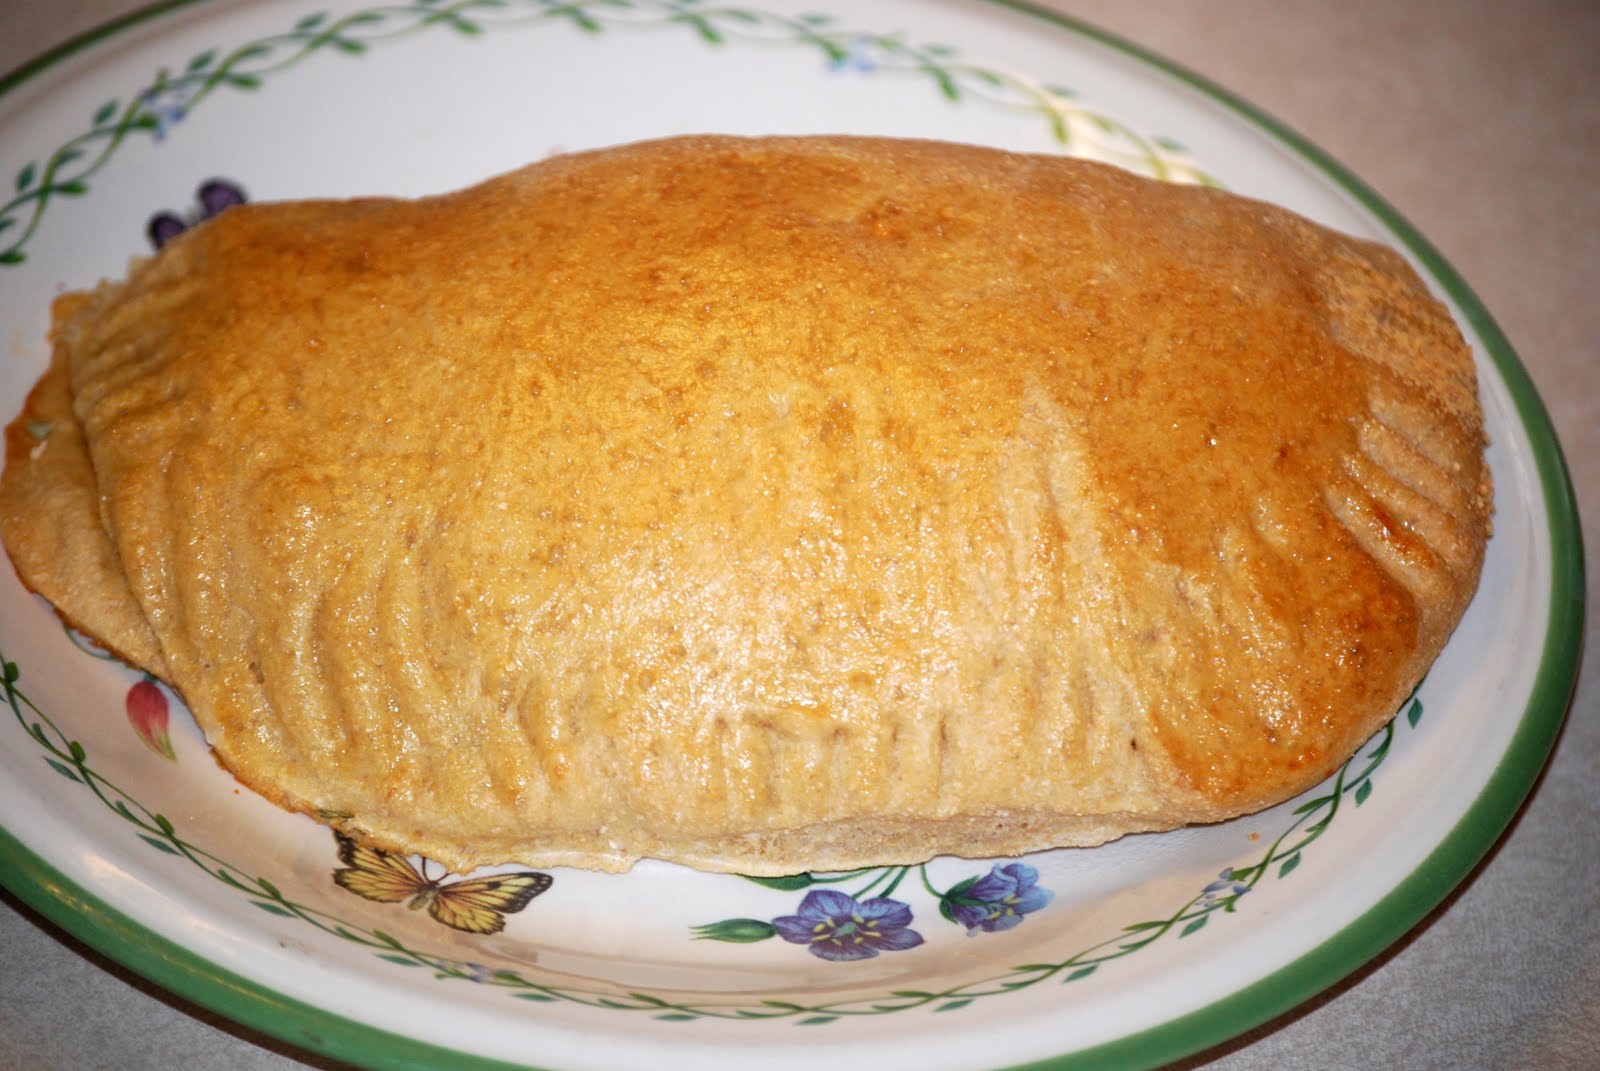
When dough is finished rising, punch it down and divide it into 6 sections. Roll each section into a 6-7 in. circle. Spread wheat berry puree on the surface of ½ of each circle. Cover the puree with ricotta cheese, mozzarella cheese, basil, tomatoes, and cheese. Fold the circle over to make a half-moon shape and seal edges with a fork. Use a pastry brush and brush beaten egg over each calzone. Bake for about 20-25 minutes, or until crust is golden brown.

Pour your favorite pasta sauce over the top of the baked calzone and serve.

**V**: Vegetarian options:
(1) Leave out the pepperoni and fill with above ingredients and TVP sausage.
(2) Fill calzones with broccoli, fresh basil, tomatoes, ricotta cheese and Parmesan cheese.
(3) Fill calzones with cooked spinach, squeezed and dried, tomatoes, fresh basil, Parmesan and
mozzarella cheese

Monday, July 26, 2010

More Sweet Potatoes...


Remember how good sweet potatoes are for you? Ahhh... sweet potatoes...that wonderful, healthy vegetable that my kids (and my husband) will actually eat...as long as it is somewhat disguised. Thanks to my friend Tifani, I have this wonderful sweet potato muffin recipe. This is another one that my family, including my husband, devours. This recipe is not in my book, so be sure to copy it if you like it!!!

Sweet Potato Muffins

Muffin Batter
1 sweet potato (medium-sized)
2 ¼ C whole wheat flour
1 tsp baking soda
1 tsp salt
1 tsp ground cinnamon
1/8 tsp ground nutmeg
1/8 tsp ground ginger
1/8 tsp ground cloves
¼ tsp allspice
¼ C vegetable oil (can substitute with applesauce to make it lower fat)
2 eggs, lightly beaten
1 teaspoon vanilla extract
¾ C honey
¾ C buttermilk
1 T ground flaxseed

Topping


¼ C oatmeal
¼ C brown sugar
½ teaspoon cinnamon
Directions

Preheat oven to 400 degrees. Pierce sweet potato with a fork five or six times. Wrap in tin foil. Bake in the oven for one hour. Mix together the topping and blend in a blender until uniform in texture. Remove sweet potato from the oven and turn heat down to 350 degrees. Mash sweet potato. Add all other ingredients EXCEPT topping ingredients. Mix until smooth. Grease muffin tins with kitchen oil spray (Pam). (I use a medium-sized muffin tin and it makes about 32 muffins…this is somewhere between mini muffins and regular-sized muffins). Fill muffin tins about ¾ full with muffin batter. Sprinkle topping on each muffin and bake for 15-17 minutes (may take longer for regular-sized muffins and a little less time for mini muffins). These are so good and your kids are eating veggies!!!

What are groats?


Maybe you have never seen this term...but I see it frequently and often wonder what it is...


I have seen oats and then oat groats, buckwheat and then buckwheat groats. So, what are groats? Groats are the hulled versions of cereal grains such as oats, buckwheat (which isn't exactly a grain as we know), and barley, etc. So, if you ever find "groats" somewhere...now you know what they are!!!

Monday, July 19, 2010

Cookbook Note:


If you purchased one of my cookbooks, you will want to check this section of my blog. I'm going to post little notes and extra instructions for my cookbook in this section. The first note is that in the pasta instructions...when discussing the electric and hand extruders...for the electric extruder...I am referring to a pasta maker similar to the Bosch pasta maker. There are many of them on the market. They have a chamber where you put the dough, a section that feeds the dough through and metal dies that shape the dough into your desired shape of noodle.


The hand extruder I am referring to is the manual pasta maker with a crank. With this type, you roll out dough and feed sheets of dough through the pasta maker and it cuts the pasta into various shapes.


ALWAYS READ YOUR OWN PASTA MAKER'S MANUAL!!!


S'Mores!!!


No Way!!! Whole wheat graham crackers??? My husband LOVES these. He says they are SO MUCH BETTER than the store-bought graham crackers and he LOVED using them for S'Mores. This weekend, make some whole wheat S'Mores!!!

Since Friday's post is usually some type of family fun post and I usually try to post a recipe on Saturday...this week Friday and Saturday's post will be combined. The Friday post is S'Mores, because that is a FUN thing to do with your kids...and S'mores just symbolize the summer to me. Saturday's post is the actual graham crackers...so consider today TWO FOR ONE!!!


Crispy Graham Crackers


½ C butter-flavored Crisco
¾ C packed brown sugar
1 T honey
1 1/8 tsp vanilla
3 C finely ground and sifted whole wheat flour
1 tsp baking powder
¼ tsp baking soda
¼ tsp salt
½ C milk

Preheat oven to 375 degrees. On medium speed with an electric mixer, mix Crisco and brown sugar until crumbly. Add honey and vanilla. Add flour, baking powder, baking soda and salt. Mix. Add milk and mix to make a moist, crumbly mixture. Take a segment of the dough and squeeze it in your hand to squish it together. Lay out a piece of plastic wrap and place the dough on the plastic wrap. Lay another piece of plastic wrap on top of the dough. With a rolling pin, roll the dough out between the plastic wrap. Roll out dough until it is very thin. Cut the rolled dough to rectangles of desired size (I like 3 1/2 X6 in. approximately). Lift the plastic wrap on one corner of the dough rectangle so you can easily grab it. Peel the dough rectangle carefully from the plastic wrap and place on a greased cookie sheet. Take a fork and push ¾ way down into the dough to make break lines for the graham crackers. Do a vertical line horizontal in the middle, giving you four lines where you can break the graham crackers. Bake on an greased cookie sheet for 8-11…or until edges are golden brown and graham cracker is crispy. Remove from oven and let cool for about 2 minutes. Move to a wire rack to continue cooling. Makes 14-16 large graham crackers.

FYI...You can substitute Smart Butter for the Crisco and just increase baking time to 10-12 minutes. It will be a little gooier consistency as dough, but just a delicious baked!!!


Smore’s


whole wheat Crispy Graham Crackers
Marshmallows
Milk chocolate candy bars (we have actually found that we like semi-sweet better!)

Prepare Crispy Graham Crackers. Roast a marshmallow. Break the graham cracker in half and put the roasted marshmallow in the middle of the graham cracker. Place a few squares of chocolate on the opposite side of the graham cracker (enough to cover the graham cracker). Put the two sides together and eat…YUM!!!

Multi-Grain Barley-Flax Muffins

Want to make some muffins with your kids...that they will LOVE and are GREAT for them??? If you have anyone in your family struggling with regularity...these are the muffins for them!!!


Multi-Grain Flax Bran Muffins

1 ½ C whole wheat flour
1 C barley flour
½ C millet flour
¼ C ground flaxseed
3 ½ C bran cereal
¾ C honey
¾ C sugar
¼ C oil
¼ C applesauce
1 C milk
1 C buttermilk
2 eggs
2 ½ tsp baking soda
1 tsp baking powder
1 tsp salt
½ tsp cinnamon (depending on how much you like cinnamon)
½ tsp allspice

Preheat oven to 375 degrees. Mix all ingredients until thoroughly combined. Let sit about 5-10 minutes so it thickens a bit. Grease muffin tins. (I use medium-sized muffin tins…they are between small and regular sized) Bake for about 15-18 minutes. Increase baking time by about 3-5 minutes for regular-sized muffins. Decrease baking time by about 5 minutes for mini-muffins. Makes about 40-45 medium-sized muffins.


Since this is kind of my family fun entry...let your kids add the ingredients and let them grind the barley and wheat. They will LOVE watching the flax grind in the coffee grinder, too!!!

Barley...Sweet Barley!!!


Okay, I know...its hot, really hot, so who wants soup, BUT, if you are trying to eat healthier and maybe trying to lose a little bit of weight...soup is SO great for you!!! Oh...did I forget to mention...its a crockpot recipe AND it has barley in it!!! That makes this soup healthy, hearty, high-fiber AND low calorie!!! If you are just too hot to serve soup right now...save this for the fall!!!


This tastes very similar to the Progresso Santa Fe Style Chicken Soup. (It is one of their low-calorie ones!)


Southwestern Chicken Soup
(CR)

1 can corn, drained
2 boneless-skinless chicken breasts
7 C chicken broth
1-4oz. can chopped green chilies
1 can black beans, drained
½ C whole wheat kernals
½ C hulled barley
1 T cumin (or to taste...sometimes I add a little more)
1 ½ tsp chili powder (or to taste...sometimes I add a little more)
1 tsp salt
1 tsp paprika
¼ tsp cayenne (optional)(sometimes I add a little more for some kick!)
2 T whole wheat flour

Mix all ingredients, except corn in the crockpot. Cook for 4-6 hours, or until chicken is no longer pink and juices run clear. Add corn about ½ hour before serving.
Serve with sour cream and crushed tortilla chips.

Let's Talk Barley


Wow! If you are struggling with regularity...this is the grain for you!!! Upon researching this grain, I found that 1 C of hulled barley has 32 grams of fiber!!!!!!!! That's a serious amount of fiber. It is also high in selenium (remember that from the wheat sprouts). Selenium is a powerful anti-oxidant...remember anti-oxidants bind to the pesky free radicals that cause diseases like cancer. It is also high in tryptophan (which is an amino acid that supposedly functions to raise seratonin levels, making you feel better and sleep better...remember all those naps on Thansgiving due to tryptophan???), copper, manganese and phosphorus. Also, the fiber in barley has some REALLY important characteristics that make it AWESOME for you! The "good bacteria" in your intestines, feed on the fiber from barley and when it ferments, it creates a short-chain fatty acid that becomes food for the cells in the large intestine. This all contributes to a very healthy colon...and possibly lighter weight...who wants to carry around five extra pounds of waste!!!


Oh, one more thing...look closely at the cost of hulled barley on the tag...apparently barley is easy on the colon AND the wallet!!!


Here is a recipe I've already given out...but I have a lot of new blog visitors...so I thought I would re-submit this one. There are two more recipes using barley this week!!!

Whole Wheat, Barley, Flax Pancakes

1¼-1½ C whole wheat/barley blend (grind 1 C wheat and ¾ C barley together to make blend)
¼ C ground flax
1 T baking powder
½ tsp salt
3 T brown sugar
1 T oil
1¼ C milk
2 eggs, separated

Make barley/wheat blend. Add 1 ¼ C blended flour (if you want thin pancakes) and 1 ½ C blended flour if you want thicker pancakes. We like them a little thicker. Grind flax in a coffee grinder. Add ¼ C to the flour, re-serve any leftover flax for later. Add baking powder and salt and stir. In a separate bowl, mix brown sugar, oil and milk. Separate eggs and add yolks to wet ingredients and put whites in a separate bowl. Beat the whites to soft peaks. Mix wet ingredients (yolks, oil, milk and sugar). Stir wet ingredients into dry ingredients. Fold in beaten egg whites. Bake on a greased, hot griddle. Makes about 12 pancakes.

Note: I like to put a little bit of syrup on the pancakes, and then sprinkle leftover flax on the pancakes. This gives you fresh flax and allows it to stick on the surface of the pancake. For my kids, I then put a little more syrup on top and cut the pancakes…they LOVE these!!!


Tomorrow, I'll give you another great recipe using barley!!!

Tip of the Day:


When baking cookies and cakes, always use FINELY GROUND whole wheat flour (if you have a wheat grinder). Turn the knob to the finest setting and then grind. Use the freshly ground flour and then you won't have to sift it. If you are using previously ground flour, be sure to sift it.
If you don't have a wheat grinder, be sure to sift your whole wheat flour. Your flour will not be the same "fine" grind, but it will still be good. They are just better if they are finely ground.
Want to know what these cookies are: Chocolate Surprise Cookies. They are DELICIOUS. I'll give you this recipe soon!!!

Friday, July 16, 2010

It's Available Again!!!


My cookbook is officially available again. If you want to learn to make whole wheat donuts, bagels, breads, pastas, cookies, cakes, bars, sandwiches, entrees and much, much more...buy it today!!!


Click here or click on the cookbook on the right

https://www.createspace.com/3458548

You can also purchase it on Amazon.

Flower Power


This is a fun little activity that my kids love. It uses the chocolate cake recipe I gave you on the 4th of July.

Here's what you need...

Chocolate Cake (recipe below...you can bake them into cupcakes to make this easier)
flower pots (enough for each child...I got mine at the Dollar Store)
silk flowers (also available at the Dollar Store)
ice cream (any flavor will work, but I personally like either vanilla or chocolate)
Oreo cookies (or any chocolate sandwich cookie)

Optional
gummy worms
caramel or fudge ice cream topping (this makes it REALLY yummy!)


How to do it

Here is the chocolate cake recipe again

Rich, Delicious Chocolate Cake

1 C buttermilk
½ C vegetable oil
2 C sugar
½ C applesauce
2 tsp vanilla extract
2 eggs
1¾ C whole wheat flour
¾ C cocoa powder
2 tsp baking soda
¼ tsp baking powder
½ tsp salt
1 C boiling water

Preheat oven to 315 degrees. Grease and flour 9X13 pan. Mix buttermilk, oil, sugar, applesauce and vanilla. Add eggs and mix until well blended. Mix together, flour, cocoa powder, baking soda, baking powder, and salt. Stir flour mixture into wet ingredients. Bring 1 C water to a boil and stir into the cake mix. Mix for 1 ½ minutes until well-blended. Pour into prepared pan and bake for about 50 minutes or until toothpick inserted in middle comes out clean.

Note You can choose to bake this cake as cupcakes for this recipe as well. It works fine, though, if you just cut the cake into pieces that fit into the flower pot.

.......................

Let the cake cool.
Wash your flower pots and flower stems.
Put a piece of unfrosted cake (or a cupcake) in the bottom of the flower pot.
Put a scoop or two of ice cream on top of the cake.
Put caramel or fudge topping on top of the ice cream. (optional)
Scrape the middle out of the Oreo cookies.
Put the chocolate cookies (minus the filling) in a plastic baggie and seal it.
Crush the Oreos with either a hammer or a rolling pin.
Sprinkle crushed Oreos over the ice cream (or over the topping if you used it)
Press the flower stem down into the ice cream and the cake until it stands up on its own.
Throw in a gummy worm or two over the dirt layer (optional...but kids love it!)

ENJOY!!!

These are delicious and fun and a great summer treat!!!

Tuesday, July 13, 2010

Want a Little Crunch?


I have a recipe in my cookbook for Nine-Grain Bread. It is DELICIOUS! Then, I tried some this weekend that didn't cook the nine grain cereal. It was great, too! So, I decided I'd post the recipe for the Crunchy Nine-Grain Bread since it isn't in my book. The great thing about the nine grain bread is that it oats, corn, millet, flaxseed, buckwheat, red wheat, white wheat, barley and rye. We already discussed the benefits of buckwheat and really, where else do you eat buckwheat? I certainly never do, but having researched the effects...I sure am going to try to start using this fabulous seed!!!

FYI...Don't worry, the rye doesn't taste like "rye bread". Rye, as a grain, just tastes like any other grain...it is the caraway seeds in the rye bread that make it taste like "rye bread".


Crunchy Nine-Grain Bread

1 C uncooked cracked nine-grain cereal (remember this has BUCKWHEAT in it!!!)
5 C lukewarm water
2/3 C honey
2/3 C oil
2 T salt
1/3 C gluten
2 T dough enhancer
13-16 C whole wheat flour
3 T yeast

Preheat oven to 350 degrees. Mix the lukewarm water and the uncooked cereal and let sit for about 15 minutes. Add the honey, oil, salt, gluten and dough enhancer. Add 9 C of flour, sprinkle the yeast over the flour, and top with one more cup of flour. Stir briefly to mix all ingredients and check consistency of dough. It should still be pretty sticky. Add flour, one cup at a time until dough is "not sticky". Knead for 10-12 minutes. Form dough into 3-4 loaves and place in a greast bread pan. Let rise for 40 minutes to an hour. Bake for 25-30 minutes.

Buckwheat...more than just a Little Rascal's Character...


Buckwheat...really, how much buckwheat do you think you get in your diet? I'm guessing, if you are anything like me...not much.

Buckwheat is usually considered a grain like wheat, rye, etc., but buckwheat is different than other grains. It is actually a seed of a fruit, similar to rhubarb! Buckwheat contains one very special nutrient called "rutin". This rutin helps lower LDL cholesterol and maintain blood flow.

Buckwheat is also high in manganese, tryptophan, magnesium and fiber and is LOW IN CALORIES!!! It is also believed to help regulate blood sugar levels. You can crack it to make a healthy cereal, roast it, or put it in pancakes, bread or other baked goods. This is one power-packed grain!!!

FYI...Buckwheat has NO GLUTEN...so if you know someone with a problem digesting gluten...refer them to buckwheat! (It isn't really wheat!!!)

Stay tuned...I'll soon be giving you a recipe using buckwheat...it goes back to our old friend the cracked nine-grain cereal...so if you don't have any...go buy it!!!

Tuesday, July 6, 2010

What if my family isn't too IN to 100% whole wheat yet???

Tip of the Day:
In the beginning, you may prefer substituting only half of the flour for whole wheat flour and keeping half of the flour white. I NEVER use white flour now, but if you are worried about your family's tastes...make the transition slowly.

I do have to tell you though, if you are worried about digestion issues...you'll be pleasantly surprised. Although whole wheat is full of fiber, it is relatively easy to digest compared to other high-fiber foods. It will definitely improve the process, but very gently. Fruit and high-fiber cereals and cereal bars are much tougher for my family's digestion than whole wheat products.


One more thing, in my recipes you CAN'T tell there is whole wheat, so if all you are worried about is taste...rest assured, you can't taste it!


Note: Cook the granola between 2 and 3 hours to get a nice, chewy consistency. It will still be gooey when you take it out. It will harden to chewy granola as it cools. If you leave it in too long it will cool and be VERY HARD!!!

Let's Make Granola!!!


Because I posted my Saturday post later in the day, I'm going to keep this post up for one more day to make sure everyone can see it. Check this out and make granola today!!!

I made a list of foods I would like to try to make out of whole grains and one of the foods I wanted to try was granola. Then, my sister-in-law and I were hanging out and SHE asked if I had a granola recipe. I decided right then that I would try to find a granola recipe that I could make in my home. So, I did some research and experimented with some recipes and finally came up with one that was really quite good! I asked my husband if he liked it as much as the store-bought granola and he said that he liked it MORE!!! It is whole-grain, cheap and easy! The more things I find that I don't have to buy in a store...the more excited I am...and I feel so much more self-sufficient.

By the way, there are a lot of variations to this recipe. I've learned that you can throw whatever you like in your granola to give it your very own twist.


Healthy, Hearty Granola

4 C oats
1 C whole wheat flour (can substitute ½ C with barley flour if you have a wheat grinder)
2 T chopped pecans or almonds (optional…and you can add up to ¼ C)
½ C wheat germ
1/3 C flax seed
1 C honey
½ C oil
1 T vanilla
1 tsp salt
½ - 1 C raisins
2 T brown sugar

Mix oats, both flours, nuts, wheat germ and flaxseed in a bowl. Add honey, oil, vanilla and salt and stir until all ingredients are evenly coated. Bake at 200 degrees for several hours (2 1/2 - 3) . Stir it about every ½ hour or so to make sure it is evenly baked. Check it until you get the consistency you desire. It’s really good if you keep it a little chewy. I take it out when it is still very moist and then let it cool so it is chewy after it cools. Serve with milk or dry as a healthy snack.

Variation: If you like your granola a little sweeter, add a little more brown sugar. You can throw in some chocolate chips or M&Ms and some whole salted almonds for a delicious trail mix!!! You can throw in any kind of dried fruit instead of raisins (chopped, dehydrated apples, dried cranberries, craisins).

Whole Wheat Sugar Cookies for a Child's Play Oven


Have you ever noticed that those recipes for the little tiny kid ovens, like Easy Bake, are VERY expensive and really cruddy. Well, we decided to try a little experiment and we made some whole wheat sugar cookies in my kids' oven. They really weren't too bad...MUCH better than the store-bought recipes AND they were MUCH cheaper AND they were MUCH healthier!!! So, if you are looking for something fun to do with your kids...try this out.


Children’s Sugar Cookies (for a child’s play oven…like an Easy Bake Oven)

1 T butter
3 T white sugar
1 tsp vanilla
Pinch of salt
1/8 tsp cream of tartar
1/8 tsp baking soda
¼ C whole wheat flour (can use about ½ tsp less if you would like them less puffy)

Mix all ingredients. Roll into ¾ in balls. Grease child’s baking pans. Place balls in greased pans. If you want, you can sprinkle them with a little bit of white sugar before baking. Bake in child’s oven (Easy Bake) for about 7 minutes. If you want them a little flatter, you can flatten them with the back of a spoon after they bake for 3-4 minutes. I had my kids make ALL of this recipe and they loved it and the cookies actually tasted pretty good! They learned to measure properly and really had a blast!

Note: you can substitute the white sugar with powdered sugar. They are delicious this way. They are much flatter, too. So, if you like them puffier, use the white sugar (picture on the left)…for flatter ones, use the powdered sugar (picture on the right).

Sweet Potatoes...


Sweet potatoes...why would we need to add more of these to our diet?


Let's begin with ANTI-OXIDANTS. First of all, I have told you what a FREE-RADICAL is, right? It is the by-product of oxidation in our bodies. (think of it as rust...another by-product of oxidation) Free radicals can cause damage to our other cells, including heart damage, cancer, etc. Anti-oxidants help us fight against these free radicals!!! That is one major reason that fruits and vegetables are so good for us! Vitamins like Vitamin A (beta-carotene) and Vitamin C can interact with free radicals and make it impossible for those free radicals to damage our cells!!!


Well...it just so happens sweet potatoes are a fabulous source of Vitamin A (beta carotene) and a great source of Vitamin C...both very powerful anti-oxidants. Sweet potatoes help us fight those nasty free radicals!!! These vitamins have other well-known advantages as well...for example, they also help eliminate inflammation. Vitamin A is used by dermatologists to treat acne...I know, I used it!!! Sweet potatoes are also a significant source of manganese, Vitamin B6, fiber, potassium and iron. These really are a WONDERFUL addition to your diet!!!

I have one big problem, though, my husband HATES sweet potatoes. So, I had to find a way to get him sweet potatoes in a way he wouldn't dislike. Thank heavens for my friend Stacey!!! She made a bread recipe years ago that was AMAZING and used sweet potatoes! She had all of us, her friends, try it out and we were hooked! I have changed it a little to make it 100% whole wheat, but it is still fantastic!!! This is a bread recipe I have been asked for MANY times, by everyone who tries it...


Stacey's Sweet Potato Bread

5 tsp yeast or 2 packets
1¾ C warm water
1 C mashed, cooked sweet potato (cooled)
½ C honey
1 egg
½ C butter, softened
2 T gluten
1 T dough enhancer
7-10 C whole wheat flour
2 tsp salt

Preheat oven to 375 degrees. Mix yeast and warm water and let sit for about 5 minutes. Add sweet potatoes and honey. Stir. Add egg, butter, gluten, dough enhancer and one cup flour. Stir. Add salt. Stir until combined. Add flour, 1 C at a time until dough is no longer sticky. Knead for 10-12 minutes or until it can be stretched very thin without breaking (it will feel very elastic). Divide dough into two mounds and form into two loaves. Put dough in two large greased bread pans. Cover and let rise for 40 minutes to an hour. Bake for 20 minutes. Without removing bread from oven, reduce heat to 350 degrees and bake for another 8-10 minutes or until golden brown. Brush with butter.
Note: These are VERY large loaves of bread.

Monday, July 5, 2010

A Review of Bread Pans


I decided to do a review of different bread pans. Originally, I believed it didn't really matter what bread pan you used to bake your bread and really, you CAN make great bread without great bread pans. However, I have found that it does make a difference in how EASY it is to make that great bread. Before I do this review, I'll have you know, I do not currently own great bread pans, but I have borrowed from my friends and my mom and I have their reviews of the pans. I have used their bread pans and found that they really do make a difference.


Review #1: The Chicago Metallic Commercial Bread Pan

My friend Sara, who makes AMAZING bread, wrote this review:

She begins by quoting Melanie from melskitchencafe.com:
Melanie said, "I have a specific loaf pan that I absolutely swear by: The Chicago Metallic Commercial Bread Pan. I’ve done side-by-side baking comparisons with my other non-stick loaf pans, dark loaf pans, glass loaf pans, and hands down, every time the Chicago Metallic pans turn out a perfect loaf. The edges don’t get burned, the bread slides out perfectly without leaving crusty remnants, and they are heavy and durable. Love them. I use the standard 1-pound loaf pan (which is the equivalent to the 9X5-inch loaf pan)."

Sara then states in her own words, "My mother happens to use Chicago Metallic loaf pans and loves them. After noticing than Melanie loves them too, I decided these were the pans for me. It is true that the bread slides out perfectly and the edges don't get burned so you don't have a thick crust, just a very nice thin crust. A nice variety of Chicago Metallic and AMCO loaf pans can be seen at this link:
http://www.amazon.com/s/ref=nb_sb_noss?url=search-alias%3Dkitchen&field-keywords=Chicago+Metallic+loaf+pans

I chose the AMCO food service pullman pan which is probably a 1 1/2 lb. loaf pan. It measures 13x4x4. I like how my bread slices are not very wide, just four inches. They fit a Kraft Single on them just perfectly! The loaf is also very long, 13 inches which fits nicely in the long bread bags that can be purchased at Kitchen Kneads in Ogden in a pack of 100. The loaf fills up the bag! The entire line of Chicago Metallic loaf pans are wonderful. FYI, AMCO is the same company as Chicago Metallic.

By the way...I have eaten Sara's bread and it is true, the top crust is nice and golden brown while the bottom is a soft, light color, creating a thin, delicious crust. It looks like the 1 lb. loaf pan is 11.99 and the 1 1/2 lb. loaf pan is 15.50. The photo shows a normal bread pan next to one of her AMCO 1 1/2 lb. pans. By the way, these are both eligible for free Super Saver shipping on Amazon. Oh...and they are dishwasher safe!!!

Review #2 - Doughmakers

My friend Jen, who is an amazing baker, has bought the Doughmakers bread pans. I have borrowed them and they really are as great as she says.

Here is Jen's review of the Doughmakers bread pans. She says, "They don't rust and they bake evenly. I have never had a problem with bread sticking to the pans. You do have to avoid spray oils, like Pam and you have to hand wash them. They run about 12.99 to 14.99 per pan." If you want the larger pans,

I have used Jen's pans and I noticed that the bread is a light color on the bottom, while the top is golden brown. The crust is soft and thin, very similar to the Chicago Metallic Commercial Bread pans. They also have handles, which are very nice when removing hot bread from an oven.


Kitchen kneads sells these bread pans: kitchenkneads.com, but you can order them directly from Amazon as well http://www.amazon.com/s/ref=nb_sb_noss?url=search-alias%3Dkitchen&field-keywords=doughmakers+bread+pans


Review #3 Norpro Professional Essentials bread pan

I borrowed these from my mom. She was told they were AMAZING...so I decided to try them out. These are darker in color and therefore, produce a darker crust. I used them today and I can write my own review on these.


The bread did not stick AT ALL! It just popped right out. Although the crust was a little darker, it was still thin and soft. The bread was delicious.

The big benefit of this bread pan besides the fact that the bread doesn't stick is that they are only 7.99!!! Kitchen kneads sells these as well: kitchenkneads.com


Conclusion:
Can you make great bread without awesome bread pans YES! I do it all the time!!! I have old bread pans that cost a few bucks. However...is it easier to make great bread with good bread pans...yes because the bread doesn't stick to the pans as much and the crust is softer, thinner, and with the lighter pans...lighter in color. You don't get the "crusty" flavor that so many people, including my children, are opposed to. You may just find that your "crust-haters" don't hate the crust when you use good bread pans. For now, I do not have the money to go out and get all new bread pans...but I am going to place new bread pans on my wish list!!!

By the way...I have some really great recipes coming...so keep on checking!!!
Note: Wait a few days to order my cookbook. I found one minor mistake and I'm going to fix it. See post below. I know I am a little too much of a perfectionist...but oh well. I should have the proof in a few days, so just watch for a post giving you the go-ahead!!!

Sorry...wait just a few days...

Sorry, I was teaching some people to make bread today and I found a minor mistake in the cookbook. If you have already purchased it, don't worry...it is MINOR and you can figure out what to do. If you have not purchased it...just wait a few days until I give you the go-ahead!!!

If you have purchased it, simply go to the half-batch recipe for the Delicious Honey Whole Wheat Bread. The second ingredient says, "1/2 C (can add 2 T more if you want). That 1/2 cup is of honey, so just pencil that right in. Sorry about that!!! It should be obvious anyway, because the whole recipe is right above and the ingredients are listed in order, but still, I do apologize!!!

BUY NOW!!!


After years of working with wheat and countless hours working on whole wheat recipes, I have finally finished my cookbook and it is for SALE!!! It has recipes for everything from cinnamon rolls, to bagels, to crepes, to pizza, to pasta, to cakes, to cookies, to donuts, to yeast breads, to quick breads, to wraps...the list goes on! Order in the next three weeks and you can get it discounted for $13. https://www.createspace.com/3458548


Kitchen Kneads has their Wonder Mill wheat grinder on sale again for $239.99!!! If you don't have one, this is the perfect time to get it! I don't know how much longer it will be on sale!!! By the way...if you order one, you get FREE SHIPPING in 48 states!!! This is the time!!! Buy here: kitchenkneads.com


Tip of the Day:

In the beginning, you may prefer substituting only half of the flour for whole wheat flour and keeping half of the flour white. I NEVER use white flour now, but if you are worried about your family's tastes...make the transition slowly.

I do have to tell you though, if you are worried about digestion issues...you'll be pleasantly surprised. Although whole wheat is full of fiber, it is relatively easy to digest compared to other high-fiber foods. It will definitely improve the process, but very gently. Fruit and high-fiber cereals and cereal bars are much tougher for my family's digestion than whole wheat products.

One more thing, in my recipes you CAN'T tell there is whole wheat, so if all you are worried about is taste...rest assured, you can't taste it!

*******************************************************

This week: we are going to do a comparison of different bread pans. We are also going to learn some cool facts and make some more delicious recipes!!! Check often and LEAVE COMMENTS!!!

Thursday, July 1, 2010

HAPPY FOURTH OF JULY (almost)!!!!


First of all, Kitchen Kneads in Ogden has their wheat grinders on sale again...for $240!!! PLUS FREE SHIPPING IN 48 STATES!!! They also have their Bosch mixers for $360. Check it out!!!
Here is their website link:
http://www.kitchenkneads.com/

See what I'm making to celebrate the holiday!!! Isn't it cute...and healthier than most desserts. I am going to make the Rich, Delicious Chocolate Cake tonight, let it cool, cover it and save it until tomorrow...believe it or not it will be just as good!!! So, tomorrow, since we are actually celebrating our holiday on the 3rd this year, I'll whip up my buttercream frosting and frost it. Then place the blueberries and strawberries on it about five minutes before serving (or the juices will run onto the cake and make it ugly). If you are doing your festivities on the 4th, just make the cake tomorrow and do the rest on Sunday. This is SO CUTE and SO DELICIOUS!!!

This cake is truly fantastic. I have made it for so many people and not ONE person could tell there was wheat. I have then had friends make it for people and not ONE person that my friends made it for could tell there was wheat in it. I will NEVER use another chocolate cake mix again, when this one is SO AWESOME and SO MUCH HEALTHIER!!! (until you add the frosting!!!)

Rich, Delicious Chocolate Cake

1 C buttermilk
½ C vegetable oil
2 C sugar
½ C applesauce
2 tsp vanilla extract
2 eggs
1¾ C whole wheat flour
¾ C cocoa powder
2 tsp baking soda
¼ tsp baking powder
½ tsp salt
1 C boiling water

Preheat oven to 315 degrees. Grease and flour 9X13 pan. Mix buttermilk, oil, sugar, applesauce and vanilla. Add eggs and mix until well blended. Mix together, flour, cocoa powder, baking soda, baking powder, and salt. Stir flour mixture into wet ingredients. Bring 1 C water to a boil and stir into the cake mix. Mix for 1 ½ minutes until well-blended. Pour into prepared pan and bake for about 50 minutes or until toothpick inserted in middle comes out clean. When cool, frost with Fluffy White, Buttercream Frosting. Five minutes before serving line up 48 blueberries in rows 8 on the top, 6 down. Then slice the strawberries in half and line them up end to end to make the stripes (make sure they are all facing the same way). SO CUTE!!!


Fluffy, White Buttercream Frosting
5 sticks butter
9 C powdered sugar
3 T milk
1 tsp vanilla

Two hours before preparing frosting, get 5 sticks of butter out of refrigerator. Whip butter for several minutes until creamy and fluffy. Add powdered sugar 1 C at a time, beating the entire time. Keep beating until frosting is very thick. Add milk and vanilla and beat.
Note: If frosting seems too thick, add an additional tablespoon of milk.


As for the suckers...well, there is no wheat, they are just cute. Since I usually post something fun to do with your kids on Fridays, I thought I would post this as an option for kids to make if you are having a 4th of July party at your house or going to a big get-together where there will be lots of children. Kids LOVE making these are they are easy and fun!!!

Fourth of July Suckers

Jolly rancher candies
Sucker sticks
Parchment paper

Preheat oven to 250 degrees. Line a cookie sheet with parchment paper. Put three jolly ranchers in a vertical line, touching each other. (You can do this as many as will fit AS LONG AS YOU HAVE ROOM TO PUT THE SUCKER STICKS IN THE BOTTOM!!!) Melt in the oven for 8 minutes. Remove from oven and press sucker stick into the bottom of the sucker (you want at least ¾ -1 in of sucker stick inside the sucker). Roll the sucker stick completely around until the whole stick is coated in melted sucker. Add sprinkles or colored sugars while still hot. Let cool until solid (at least 10 minutes). We then wrap them in sucker bags and tie them with ribbon. Kids LOVE these and they can do ALMOST all of it by themselves!!!


FYI...this dessert is great for Memorial Day, Labor Day, Flag Day, or if you live in Utah the 2
4th of July. You could also make the Ooey Gooey Not-So-Wheaty Brownies instead of chocolate cake (it is in the dessert segment of my blog)